Common computer problems - Computer Guide World

Introduction:- Computer despite their advancement and reliability can encounter various problem that can hinder their performance or functionality. These problems can increase from minor inconveniences to major system issues. Understanding common computer problems can help user troubleshoot and resolve these issues effectively. Here are some of the most common computer problem.
- Understanding Slow Boot Time
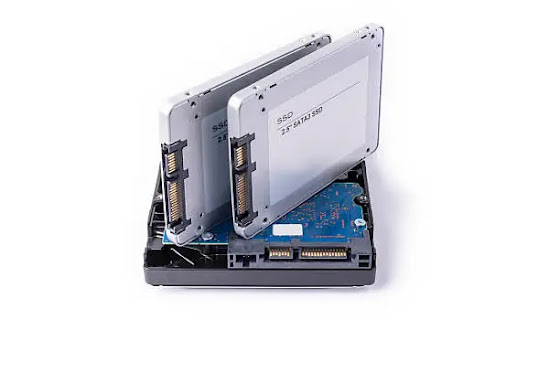
- Identifying Hard Drive Issue
- Diagnosing Hard Drive Problem
- Addressing Hard Drive Issue
If computer operating system boot-up time has significantly increased, it is essential to investigate the potential causes, with a particular focus on your hard drive. Problems with the hard drive can prevent the retrieval of information, leading to slow boot times. By identifying and addressing these issues promptly, you can restore optimal system performance. Remember to consult professional help if needed to ensure an accurate diagnosis and appropriate solutions.
Power Issues:- POST stand for Power On Self Test and is an essential parts of a computer startup process. It play a important role for diagnosing the functionality of hardware parts, such as the keyboard, random access memory (RAM), disk drive and other critical elements. By performing a series of check, POST ensure that the computer hardware is in proper working order. In this article we will immerse into the important of POST and how it alert user to potential hardware issues through on-screen error messages or audible beep code.
When you power on your computer, the POST program is executed automatically as part of the startup routine. Its primary purpose is to verify the probity and functionality of essential hardware parts. The POST process occur before the operating system is loaded, ensuring a reliable foundation for the computer overall performance.
Hardware issues:- Computer problems always come due to hardware failure or issues with hardware drivers. Windows operating systems provide helpful notifications about devices encountering problems and allowing user to take appropriate action. In addition, the Device Manager utility offer a comprehensive overview of the status of different hardware devices. By utilizing Device Manager effectively, user can identify and troubleshoot hardware-related issues. here we will explore the steps to open Device Manager and utilize its features to diagnose and resolve hardware problems.
Accessing device Manager in windows, follow these steps:-
- Press the Windows key + R simultaneously to open the Run dialog box.
- Type devmgmt.msc in the run box and press Enter. This action will launch the device manager and you can troubleshoot with device driver.
RAM and CPU Utilization:- If you notice that your computer is running slow and it is crucial to identify any programs or processes that might be consuming excessive system resources. By using the default Task Manager, you can achieve insight into CPU and RAM usage and enabling you to petty resource-hungry application. here we will explore the steps to access Task Manager and utilize its features to diagnose and address performance issues and ensuring a smoother and more responsive computing experience.
- Accessing task manager in windows, follow these step:
- Right-click on the taskbar located at the bottom of your screen.
- From the context menu that appears
- Select task manager alternatively, you can use the keyboard shortcut "Ctrl + Shift + Esc" to open Task Manager directly.
- Analyzing Resource Usage:-
- Once task manager, follow these steps to assess CPU and memory usage.
- By default, task manager open to the "Processes" tab.
- This tab displays a list of all active processes and their analogical resource usage.
- CPU Usage: For monitor CPU usage, click on the CPU column header. This will sort the processes based on their CPU consumption with the most resource-intensive process listed at the top. Beside you can view a graphical representation of CPU usage by clicking on the CPU column, which show a graph illustrating right time CPU utilization.
Memory Usage: For analyze RAM usage click on the Memory column header Similar to CPU usage, the processes will be sorted based on their memory footprint. You can also view a graphical representation of memory usage by clicking on the Memory column title, allowing you to track RAM utilization over time.
Check Installed Software:- When you face computer performance issues, it is essential to consider the impact of resource-intensive software. Certain applications may required more resources than your system can provide, leading to slowness and performance fall. In this article we will discover strategies to identify and address software-related problems by uninstalling recently installed programs and optimizing the number of startup programs. By these steps you can optimize resource usage and enhance your computer overall performance.
Identifying doubtful Software: To determine if software is causing performance problems, consider the following approaches.
- Timeline Assessment: If the issue come after launching a specific software application then it is likely that the software is the root cause. Identify any recently installed programs or updates that match with the onset of the problem.
- Startup Behavior: If the issue come immediately while booting up your computer, it could be caused by software that start automatically during the startup process. Take note of any programs that initiate during startup and their potential impact on system performance.
- Remove recently Installed Programs: Go to the Control Panel by clicking it on the Start menu and selecting Control Panel. the Control Panel locate and click on the Uninstall a program or Programs and Features option. This will show a list of installed programs on your computer.
- In the program list, click on the Installed On or Date Installed column header to sort the programs based on installation date. This will help you identify recently installed software.
Identify Computer Noise:- When noise come to the computer hardware, the hard drive is a critical component responsible for storing and retrieving your valuable data. If you notice any abnormal sound such as scratching or loud noises come out from your hard drive then it is essential to take immediate action. Additionally monitoring the performance of your CPU fan which can help identify potential overheating issues. In this article we will discuss steps to address a damaged hard drive including shutting down the computer, seeking professional assistance, backing up data and ensuring data recovery options.
recognize a Damaged Hard Drive: If you doubt a damaged hard drive then follow these steps to reduce further damage and find professional help.
- Shut Down the Computer: When you hear unusual noises such as scratching or loud sound coming from your hard drive then power off your computer immediately. Continued operation can worsen the damage and potentially render data irretrievable.
- Professional Diagnosis: Contact a experience computer technician or data recovery specialist to diagnose and assess the extent of the hard drive damage. These professionals get the expertise and tools necessary to provide an accurate evaluation.
- Monitoring CPU Fan: Keeping an eye on the performance of your CPU fan can help identify potential overheating issues, which can be linked to excessive workload. Follow these guidelines to monitor your CPU fan
- Listen for Fan Noise: Keep attention to the sound of your CPU fan. If it is consistently running at a high speed, it may indicate that your CPU is working hard and generating excess heat.
- Check Proper Ventilation: Verify that your computer cooling system is functioning correctly. check that the airflow is not interrupted and that the fan blades are clean and free from dust collection.
- Immediate Backup: If you suspect a damaged hard drive, prioritize backing up your data immediately. Utilize external storage devices, cloud services, or another computer to create duplicate copies of your valuable files.
- Data Recovery Professionals: If you are unable to back up your data due to the intensity of the hard drive damage, contact to data recovery specialist. They possess specialized techniques and equipment to recover data from damaged drives.
Install & Run Antivirus Software:- In the ever evolving landscape of technology, the presence of virus has become a significant threat to computer performance and security. If you encounter sluggishness or unusual behavior on your system, it's crucial to consider the possibility of malware infection. Conducting regular virus scans can help identify and eliminate malicious software. In this article, we will explore the importance of malware scanning, recommend trusted antivirus programs, and emphasize the significance of frequent updates for optimal protection.
- Understanding the Impact of Malware:- Malware including viruses, Trojans, ransomware, and spyware, can more impact computer performance. It may cause system slowdown crashes, data violation and unauthorized access to sensitive information. Identifying and removing malware is essential for maintaining a secure and efficient computing experience.
- The Importance of Virus Scanning: Performing regular virus scans is important to ensure your system Arrear free from malware. Follow these guidelines to conduct effective virus scans
- Choose a License Antivirus Software: Select a reputable antivirus software from well established brand known for their expertise in malware detection and removal. for Example include Norton, McAfee, and Malwarebytes. These software offer comprehensive protection and regular updates to fight the latest threat.
- Keep Your Antivirus Updated: Ensure that your antivirus software is continuously updated to stay abreast of the evolving malware landscape. Regular updates provide new virus definition and security patches that increase your system protection against increasing threats.
- Schedule Automated Scan: Set up automatic scan to run at regular break such as daily or weekly, to ensure continuous protection. Automated scans help detect and eliminate malware without requiring manual interruption.
Troubleshoot in safe mode:- When you face major issues with your computer operating system then it is necessary to exhaust all available options for troubleshooting. Safe mode diagnostic mode of operation that load only important system files and drivers, can help identify whether the problem lies within the operating system. In this article we will explore the process of troubleshooting in safe mode and discuss the potential need for a Windows reinstallation as a last resort solution.
- Access Safe Mode: Restart your computer and continuously press the F8 key (or Shift + F8 in newer version of Windows before the Windows logo appear. This will bring up the Advanced Boot Options menu. Select Safe Mode or Safe Mode with Networking if you require internet access.
- Observe System Behavior: Once in safe mode, observe the system behavior and check if the problem persists. If the issue is resolved or not present in safe mode, it indicates that a third-party program or driver is likely causing the problem. You can proceed with further troubleshooting steps to identify the specific culprit.
- Update Drivers and Windows: update your device drivers and ensure that Windows is okay. Outdated drivers or missing Windows updates can sometimes cause compatibility issues or system instability.
Reinstalling Windows as a Last Solution:- If the problem persists even in safe mode and all other troubleshooting attempts have been unsuccessful then reinstalling Windows may be necessary. Before proceeding ensure you have backed up all important files and data. Follow these general steps for a Windows reinstallation:
- Create Installation Media: Obtain a Windows installation disc or create a bootable Pen drive with the Windows installation files.
- Boot from Installation Source: Restart your computer and boot from the Windows installation source. Follow the step to initiate the installation process.
- Choice Installation option: During the installation you will be followed to select the installation type. choice the option to perform a clean installation, which format your system drive and install a fresh copy of Windows.
- Follow On-Screen Instruction: Follow the on-screen instruction to complete the Windows reinstallation process. Ensure you have your Windows product key ready if required.


Comments
Post a Comment
Please do not enter any spam link in comment box