Your connection is not private , how to fix error
When we do any web search in Google, at that time an error message comes as "Your Connection Is Not Private".To fix the error, I am telling you the steps to follow below.
Your connection is not private , how to fix error
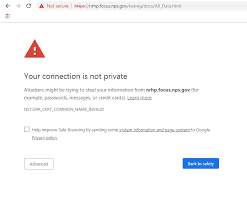
If you are also getting this error, then there are four ways to fix it. This error message persists even after changing several Chrome settings, and we are unable to search any websites. follow the instructions given below for fix this Error
(1) Change the computer time and date
The first thing is that to make sure your computer date and time are accurate or not. If don't then go to the control panel and Change it.
Follow Below Steps

Select Date and Time from the Control Panel.

Click on the change date and time

Set the time and date, then click "Apply" and "OK."
Search the website once more, and if the issue still occurs after searching, proceed to step two.
(2) Clear Google Chrome's history

In Chrome, click on the the three dots above.

Click on History button

The three lines on the side of History should be clicked.

Click on the Clear Browsing Data

Choose All Time, then select "Clear Data."

The history of Chrome will be deleted.
If the issue persists after searching the website, restart Chrome and try closing and reopening it. If so, proceed to step three.
(3) Apply Google Public DNS

Go to Control Panel and click on Network and Sharing Control.

Click on the Change Adapter setting

To access properties, perform a right-click on the WiFi or Local network connection icon.

Click on Properties after selecting Protocol version 4.

Tik on Type DNS IP Address and the following DNS server address.
Preferred DNS - 8.8.8.8
Alternate DNS - 8.8.4.4
Click OK to close it.
Once you've searched the website, check it out. If the issue still occurs, then proceed to step four.
(4) Update to DST Root CA X3 File

Click on the start button in computer

When the system prompts you to choose YES or NO, click on YES after typing MMC in the RUN option.

Click on the File Option

Select Add/Remove Snap-In from the menu.

Choose the Certificate option, then click ADD and OK.

Select the "Computer Account" checkbox.

Click on the Next Option

Click on the Finish

Click OK after the certificate has been Added.

Double-click on the marked Certificate (Local Computer)

Double click on Trusted Root Certification Authorities option

Double click on the Certification option on the right side

Select DST Root CA X3

Right click on DST Root CA X3 and click on Delete

Select Yes so that we can get the most recent DST Root CA X3.
The DST Root CA X3 file can be downloaded by clicking the link below.

Right click on the Certificates Tab, click on All Tasks- Import

Click on the Next

Click on the Browse

Click on Open after choosing the downloaded DST Root CA X3 file.

Click on the Next

Click on the Next

Click "OK"

Click on Close, then select No.
Now that the DST Root CA X3 file has been updated, shut down Chrome and perform a website search.
I hope above all step help you for fix Your Connection Is Not Private Error .
Related Question:-
- How to fix a “Your connection is not private” error yourself
- Why does it keep saying my connection is not private?
- Why does Chrome keep saying your connection is not private?
- How do I get rid of connection is not private in Chrome?
- How to Fix “Your Connection is Not Private” Error
- Your connection is not private Chrome
- Your connection is not private Windows 7
- Your connection is not private Chrome fix Windows 7
- your connection is not private chrome fix windows 10
Thanks


Comments
Post a Comment
Please do not enter any spam link in comment box